It’s important that you have the perfect crosshair in a game like Marvel Rivals, so dive in to how you can change it.
A good crosshair is just as important as good aim when it comes to landing your shots. It is how you line up your shots, so you'll want it to fit perfectly with what your eyes can see and what character you play the most. So, let's go over how to change your crosshair in Marvel Rivals.
How to change your crosshair in Marvel Rivals
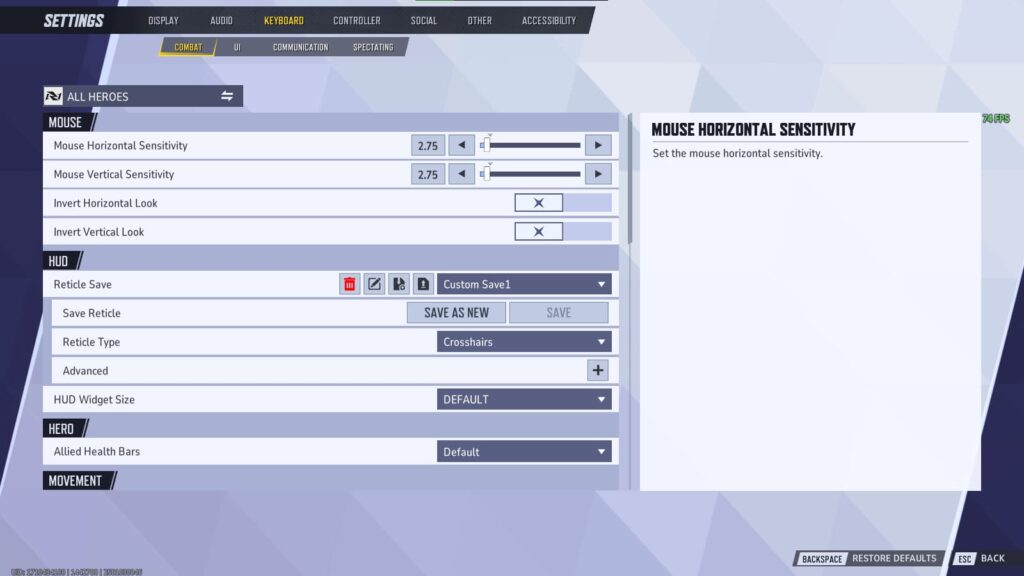
The steps are very easy when it comes to changing your crosshair. You just have to do it from the Settings menu. Here's how:
- Open Marvel Rivals
- Select the Gear icon at the top right
- Choose Settings
- Navigate to either Keyboard or Controller, depending on which you use
- Locate the HUD section in the Combat menu
- Click the plus sign on the Advanced option
- From there, choose the different settings for your crosshair, named Reticle in the game
You can choose a separate crosshair for every hero if you'd like, or stay with the All Heroes choice to make the crosshair the same no matter who you are playing.
Related articles
Crosshair options available
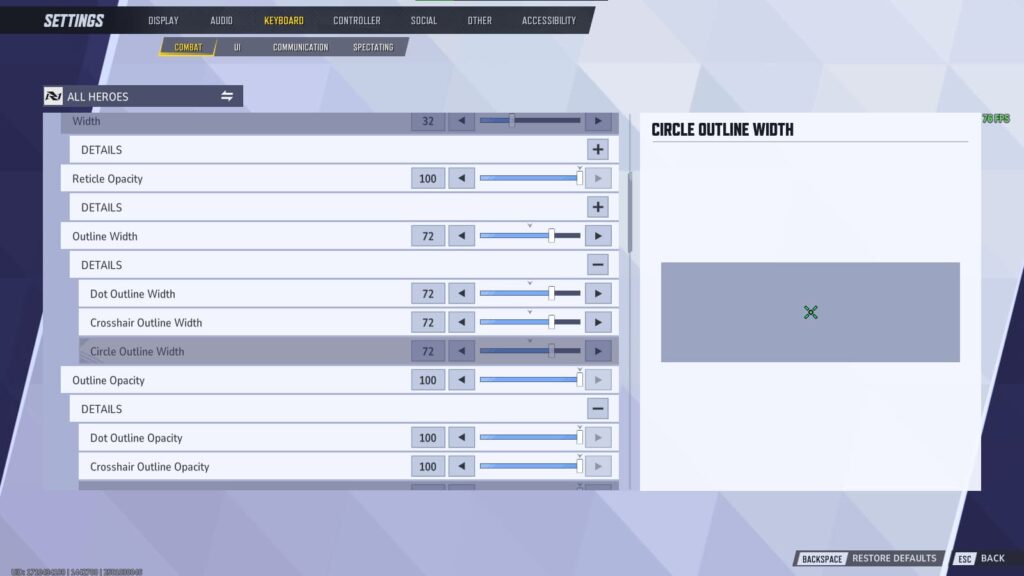
Here is a list of every crosshair setting available, whether you're going to use them or not:
- Reticle Type
- Default
- Circle
- Crosshairs
- Dot
- Circle and Crosshairs
- Reticle Animation: On or Off
- Reticle Animation
- Width
- Reticle Opacity
- Outline Width
- Dot Outline Width
- Crosshair Outline Width
- Circle Outline Width
- Outline Opacity
- Dot Outline Opacity
- Crosshair Outline Opacity
- Circle Outline Opacity
- Blur
- Dot Blur
- Crosshair Blur
- Circle Blur
- Center Gap
- Crosshair Radius
- Circle Radius
- Crosshair Length
- Crosshair Angle
- Color
Then when you're done changing your crosshair in Marvel Rivals, scroll back up to save it. You can even give the save file a name. After that, you can choose Import Save to paste a crosshair code or Export Save to get a crosshair code for the one you just made.
Stay tuned to esports.gg for more esports news and Marvel Rivals coverage.


